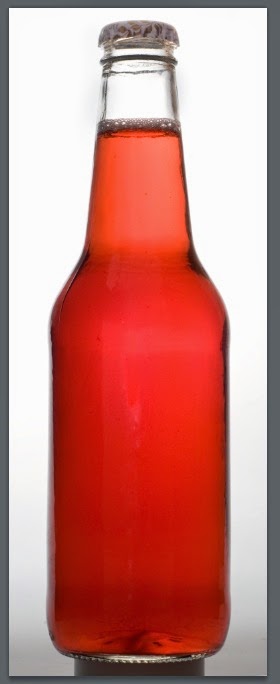
When you combine elements from different images into one, it's called compositing. The main task in doing this is "Selection". You can select a certain area of an image to paste it elsewhere using several different methods. For items with hard defined edges (like this bottle below), you could use the magnetic lasso, magic wand or the (most precise) pen tool. The Pen Tool creates a path, which can then be turned into a selection. For cutting out something with a fuzzier outline (like someone's hair, or a furry cat) it's a bit more complicated. You'll want to use a method like channels, refine edge or quick selection (see below).
Pen Tool:
The Pen tool is the most precise way to select an area of an image. For example, if you want to cut someone out of an image and place them on a new background, you can trace the outline of the person most accurately with the pen tool.
The Pen tool does not write, it is just used to make a selection. You use it to make a path: a path is created by making several points on the perimeter of a that person you want to cut out . You then "connect the dots" to create an outline. This series of "dots" or anchors that you make is called a path. To see your path as it's created, go to WINDOW > PATHS and make sure there is a check next to it.
I generally work clockwise around the perimeter of an object to make a path. Make sure you are zoomed WAY in (like to 200%). Click to make an anchor. Click and pull to make an anchor with 2 arms that will create a curve.
Take this image for example. The original photo looks like this:
It was photographed on a white background, but looks grayish, and needs to be cut out and placed on a perfectly white background to look like a clean product shot. So we use the Pen Tool to cut it out, and create a new drop shadow:
After tracing around the entire bottle with the pen tool, I turned the path into a selection by clicking the little dotted circle at the bottom of the paths palette. (Path and anchors must be live/visible for this to work. If it's not working, click on your path with the pen tool until you can see the anchor points. Then click the dotted circle).
Notice the order of my layers above. On new separate layer under the bottle, fill that same shape with gray. EDIT > FILL with 50% gray. Lower the opacity and FILTER > BLUR> GAUSSIAN BLUR to make the shadow look more natural. Command T (EDIT > FREE TRANSFORM) to make the shadow change position. You can also try EDIT > TRANSFORM > SKEW:
MORE ADVANCED COMPOSITES:
For areas with fuzzy outlines, like a furry cat or someone's hair, making a selection using Refine Edge can be more successful.
Compositing with Quick Selection Tool:
- Place the image of the subject on top of it’s new background
- Using the quick selection tool, make a selection of the subject. Use a small brush for detailed areas and to be more precise. Hold down command for the “minus” tool.
- Select > Refine Edge. Use the “On layers” view.
- Use the refine radius tool (next to "edge detection” to go around edges, especially hair.)
- Export as a layer mask. Continue to refine the mask with black or white brushes as needed.
Here's another helpful video about making selections around soft edges like hair:
This photo below is by one of my students, Dona Foster. The new background (her idea) is a scanned in piece of old paper. This image worked especially well because there was a monotone background. You can use the quick selection tool to select the bird, then hit the Refine Edge button to separate the bird from the background. Afterward, you can paint on the mask to bring in any extra detail your quick selection tool might have missed. Add the scanned paper in as a layer underneath.


No comments:
Post a Comment